Product intro and specs
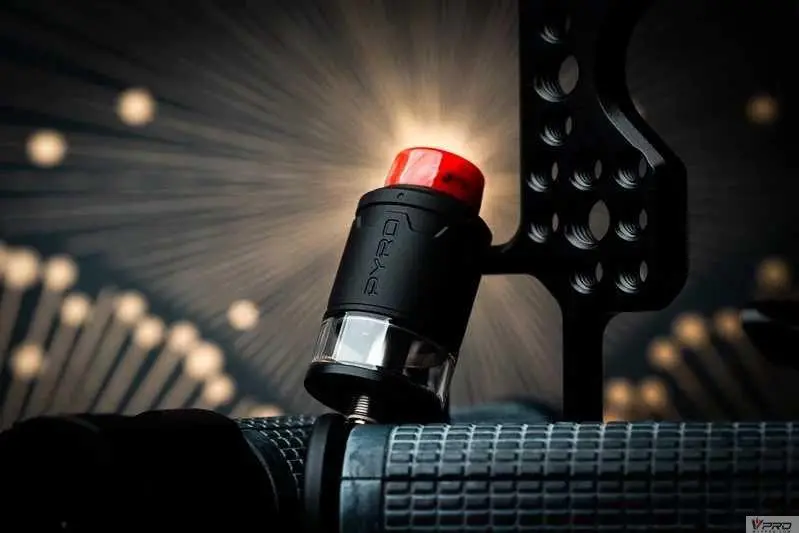
The Vandy Vape Pyro V3 is a squonkable dual-coil RDTA with a postless deck made for big clouds and flavor. It’s a 24 mm atty that sits on top of a tank with a little over 2 mL juice capacity. The postless deck also features easy-to-use fill ports that get closed off by the top cap, which make the tank leak-resistant. Also, it’s equipped with generous adjustable honeycomb airflow that hits both the side and underneath the coils, or just from the side. When you see the Pyro V3, you may think it looks like a typical RDTA, and it basically is…but that doesn’t mean the performance is typical.
Specifications:
- 24 mm diameter & 2 ml E-juice capacity
- Advanced airflow intake system
- Optimized filling structure
- Enhanced bottom airflow design
- Size: 37mm * 24mm
- Capacity: 2 ml
- SS / Matt Black / Rainbow / Gunmetal / Gold / Blue / Grey
Kit Contents:
- Vandy Vape Pyro V3 RDTA
- Spare Parts Bag
- User Manual
- Pyrex Glass Tube
- Coil Lead Guide
- 2pcs Fused Clapton Coil 0.33ohm
Build quality and design

The Pyro V3 keeps in line with the overall look of the other Pyro RDTAs. If you like the look of them, you’ll like the look of this one. I received two matte black and one blue version. They all look good, but the blue in my eyes looks the best.
Like many Vandy Vape products, the Pyro V3 RDTA is designed and manufactured nicely. The threads and O-ring tolerances are spot-on with the ones I tested. Aside from one I gave to a fellow vaper to test that had super-tight O-rings he had to replace, I have had no issues with the tank and its accessories.
The Pyro V3 comes with:
- Spare O-rings
- Extra screws
- Gold-plated squonk pin
- Coil-leg tool
- Spare glass tank
- Pair of fused Claptons
- Only one drip tip
The Pyro V3 stands 24 mm x 37 mm. It only comes with one resin tip though. But it’s a nice 810 with a wide bore that funnels from about 9 mm to 11 mm.
The tank is stated on some sites to hold only 2 mL, but it holds closer to 3 mL. But still, it’s a low liquid capacity; it requires frequent refilling based on how much power this device is best suited for. Although you can dial in a restricted lung hit, this is power hungry. Luckily, the Pyro V3 has two fill ports that get sealed when putting on the top cap, so frequent fillings should not increase the chance of leaking. And even more convenient, you can squonk in the tank for the easiest filling…if you have a squonk mod capable of powering the coils you use.
The Pyro V3 is an interesting RDTA. Like its predecessors, it’s a postless deck RDTA. But this Pyro has side and bottom-fed airflow. Inside the top cap, there’s a non-removable piece that both plugs the fill ports and works to adjust the T-shaped honeycomb airflow that come in from either the side and the bottom, or just the side.
Build deck and wicking

A straight forward postless deck that allows for trapping dual-coil leads vertically. The screws used are gold-plated combo Phillip’s/flat-head screws. I’m not a fan of Phillip’s head screws, but I like that I can use a flat-head driver with these.
Dropping in coils and trapping is easy…once you cut your leads. There’s a handy coil-lead tool that’s clearly marked at the 6 mm mark for where it’s best to cut your leads. After snipping your leads, drop them in, trap them, and adjust as needed.
The coils sit over a deck of 12 holes; 6 rows of 2. Based on how the coils line up, there’s not a lot of room for getting in dual-coils above 3 mm, so I recommend staying under that just to be safe. You can use this deck with a single-coil if you wish, but I think it’s best to think of as a dual-coil deck. Of course, crafty builders will do what they want to find their own best experience. Everyone else should just stick to traditional coils of around 2.5 mm to 2.75 mm.
Wicking

The wick ports are wide and there’s nothing that will cause you to have to fiddle. The two coils sit side by side and share wick tails with each port. The wick ports measure 4 mm x 10.3 mm, which gives ample room for cotton to keep from getting bunched up. Do make sure that there’s enough cotton to keep liquid from being able to come out of the wick ports, but it should not be too tight or your wicks will get choked.
Of course, as with all RDTAs, just let the cotton hang inside the tank a little. There is no need to have those silly Vivi Nova style wicks that hang into the tank. Those are not effective for RDTAs, despite the fact that it looks like it would work best. That said, with the wicks being up high, a little bit of juice depletion will cause you to have to tilt the tank to saturate the wick. Typically speaking, enough tilting will happen from the tank just moving around while in use. But if you think you must, go ahead and tilt. Luckily, based on the mechanism inside of the tank, you won’t have to worry about spillage—as long as your wicks do a good enough job of sealing the ports.
Top cap, airflow, and refilling

The top cap houses a non-removable mechanism that locks into place with the deck. It’s responsible for the airflow intake and plugging the two generous-sized 3.3 mm fill ports. To put the top cap on, you have to look inside of and line up the metal plugs with the corresponding openings of the fill ports. Unfortunately, though, if you’ve adjusted your airflow, you have to look under the top cap to see where they are. Because the top cap spins to adjust the airflow around the mechanism on the inside, it’ll be in a different place than it is when the airflow is all the way open. When I first got the tank, I thought I could look on the outside of the cap to line it up. Nope.
Adjusting the airflow is where things get less than ideal. The airflow is not fully adjustable, nor does it stop on the turn. Here’s how it works:
Turning the top cap shuts down both the vertical and horizontal portion of the “T”, one vertical row of two holes at a time. If you shut down more than one row, you end up closing off the entire bottom-fed portion of the airflow (it’s only two vertical rows of air holes). After that, there are 8 total holes left on the top part of the “T”, but shutting them down more places the airflow somewhat behind the coils. Off-center.
You can get a really satisfying restricted lung hit with the airflow closed down, but it doesn’t hit the coils in an optimal space. I hear a whole lot of noise from the coils cooling down after taking a hit, as if they hadn’t gotten adequate air to begin with. That’s something that bugs me! That’s why I think this tank works best with one row closed off from the top and bottom portion of the “T”.
On a positive note, the mechanism in the top cap is SS, which allows you to easily see your airflow setting on all the colored Pyro V3s. I don’t have the SS version, but I imagine it may be a little harder to see your settings on that one. That’s something a lot of honeycomb airflow patterns have a fault with.
Performance
Aside from my issues with the airflow, this tank performs incredibly well. It’s one of the best direct-lung hit RDTAs I’ve ever used. I don’t know why, but MTL versions of this kind of rebuildable often work well, but direct lung RDTAs in my opinion are frequently a letdown. Not with this tank! I’m largely impressed.
Just using the two fused Claptons Vandy Vape included with the tank, I’m getting luscious flavor and copious vapor. Not only was I not expecting that, I was ready for this to be a lackluster. It’s kinda blowing my mind it’s so good. I do wish I could just use the bottom airflow, but I can’t.
It’s a bit power hungry; I use mine around 90 watts. With the low liquid capacity, it’s best to use it in squonk mode. That way you don’t have to keep taking off the top cap. I have mine on a Pulse Dual. I sometimes take off the cap if I want to drip a different liquid onto the cotton than what’s in the squonk bottle, but I prefer squonking to fill the tank. That said, if you don’t have a squonk mod capable of handling low-resistance dual coils, you’ll be fine filling it through the deck.
Pros / Cons
- (+) Well made
- (+) Leak resistant
- (+) Squonkable
- (+) Smooth airflow
- (+) DL or restricted lung hit
- (+) Great flavor
- (+) Copious vapor
- (-) Not fully adjustable airflow
- (-) No bottom-airflow by itself
- (-) Restricted airflow doesn’t hit coil optimally
- (-) Airflow adjustment doesn't stop on turn
- (-) Low liquid capacity

Verdict
If you don’t need a restricted lung hit, this RDTA is really good. It can produce a good draw of a restricted lung hit, but the air doesn’t hit the coils optimally when shut down. So while I do have some pet peeves with the airflow adjustment and the low liquid capacity, the sheer performance of flavor and vapor has not disappointed. This is one of those tanks that doesn’t look wildly different than others like it, but for some reason the performance really shines. This is an above-average RDTA, plain and simple. Although I would really like to see how it performs with just the bottom-fed airflow, I think its performance is great as is.
Recommended.

Article Provided By:

Article Written By: Jeremy Mann


